


1. Грунтовка для ремонта кожи: Оценка повреждений – первый шаг к успеху
2. Перед ремонтом поврежденной кожи рекомендуется проконсультироваться с профессиональным продавцом мебели или других кожаных изделий, чтобы определить характер повреждения вашего изделия и выбрать метод ремонта. Существуют различия в методах ремонта 3. искусственной 4. кожи и натуральной кожи. Избегайте неправильного ремонта, чтобы не понести ненужные потери. Если это дешевое кожаное изделие, вы можете попробовать изучить методы ремонта кожи и попытаться отремонтировать его. Для дорогих кожаных изделий рекомендуется проконсультироваться с продавцом, который продал вам изделие.

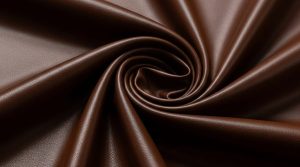
5. Знайте свой тип кожи: натуральная, искусственная или синтетическая?
6. Вокруг нас существуют различные виды кожаных изделий, включая натуральную кожу (изготовленную из шкуры животных), искусственную кожу (ПВХ) и синтетическую 7. кожу (ПУ)8. . Во-первых, рекомендуется понять, к какому типу кожи они относятся, чтобы вы могли отремонтировать их соответствующим образом и знать, какие средства по уходу за кожей и инструменты для ремонта следует использовать. Вы можете узнать тип имеющегося у вас кожаного материала, проконсультировавшись с продавцом, который продает изделие, или обратившись в агентство по тестированию материалов, но это обойдется вам в значительную сумму.
9. Характеристики различных типов кожи и их влияние на методы ремонта
| Измерение сравнения | Genuine Leather | 10. Синтетическая кожа ПУ | 11. Искусственная кожа ПВХ |
|---|---|---|---|
| 12. характеристика | 13. Она натуральная, «дышит», имеет поры и впитывает питательные вещества. Обладает превосходной мягкостью и эластичностью, но со временем высыхает и покрывается мелкими трещинами. | 14. Она мягкая и эластичная, с текстурой, близкой к натуральной коже, и определенной степенью воздухопроницаемости. Со временем покрытие и основная ткань гидролизуются, прилипают или отслаиваются. | 15. Текстура твердая, пластиковая, полностью воздухонепроницаемая. Со временем она становится твердой, хрупкой и трескается на поверхности из-за потери пластификаторов внутри. |
| 16. Источники материалов | 17. Шкуры животных (корова, овца и т. д.). | 18. Полиуретановая смола — это высокомолекулярный полимер. | 19. Поливинилхлоридная (ПВХ) смола — это, по сути, пластик. |
| 20. структура | 21. Трехмерная сеть, образованная нерегулярным переплетением натуральных коллагеновых волокон. | 22. Слоистая структура «покрытие из ПУ смолы + основная ткань (нетканый материал и т. д.)». | 23. Слоистая структура «покрытие из смеси ПВХ смолы + основная ткань». |
| 24. Рекомендуемый метод ремонта | 25. Питательный ремонт: Глубокая очистка и уход с помощью моющих средств, питательных масел и кондиционирующих кремов. • Используйте проникающие красители для коррекции цвета. Для отслоений краски используйте наполнительные пасты и специальные краски для поверхностного ремонта. | 26. Поверхностный ремонт: Ремонт разрывов с использованием специального клея и прокладок. Заполнение трещин гибким наполнителем. Перекрашивание и герметизация поверхности с использованием специальной ПУ краски или виниловой краски. | 27. Ремонт пластика: • Склеивание прочным виниловым клеем и прокладками. • Для мелких царапин попробуйте использовать термофен (требует большого мастерства), чтобы аккуратно нагреть поверхность и помочь ей сплавиться. • Закройте повреждение виниловой краской/покрытием для подкраски. |
| 28. Не рекомендуемый метод ремонта | 29. Поверхностная герметизация: Использование сильного, недышащего клея или твердой краски сделает кожу жесткой, препятствуя ее дыханию и ускоряя износ. Использование жидких чистящих средств на сильно впитывающих видах кожи, таких как анилиновая кожа. | 30. Проникающий уход: Используйте дермальное питательное масло/крем для ухода, так как слой ПУ не впитывает его и оставляет только жирный слой. Используйте твердые наполнители или краски, так как ПУ очень мягкий, и твердые материалы легко отвалятся или потрескаются. | 31. Любое питание или уход: Категорически запрещено использовать любые средства по уходу за кожей (масло для ухода, питательный крем), которые совершенно неэффективны. Обычные красители не могут прилипнуть к поверхности ПВХ. |
32. Простые навыки идентификации кожаного материала
33. 1. Наблюдайте за текстурой поверхности и порами:
Натуральная кожа:
34. • Неравномерная текстура: При внимательном рассмотрении поверхности кожи видно, что текстура (поры и зерно) натуральной кожи нерегулярна и неравномерна. Даже тисненая кожа будет иметь естественно неравномерную текстуру под ней.
35. • Пористая: Видны крошечные поры, что является характерной чертой животной кожи и источником ее воздухопроницаемости. Легкое сгибание кожи пальцами покажет естественное изменение зерна.
35. ПУ:
36. • Регулярная текстура: Зерно ПУ кожи обычно создается с помощью формы, что приводит к очень однородной, регулярной и даже жесткой текстуре. Зерно практически идентично на всех участках.
37. • Непористая: Поверхность закрыта, видимых пор нет.
38. ПВХ:
39. • Более искусственная текстура: Зерно ПВХ часто более искусственное и неестественное, с сильным ощущением пластика.
40. • Непористая: ПВХ также не имеет пор.
41. 2. Ощупайте текстуру и эластичность руками
42. • Натуральная кожа: На ощупь она полная, мягкая и эластичная. При нажатии пальцами на поверхность образуются небольшие морщинки, которые естественным образом исчезнут или уменьшатся после того, как вы отпустите пальцы.
43. • ПУ: На ощупь похожа на натуральную кожу и также относительно мягкая, но обладает меньшей эластичностью. При нажатии поверхность прогибается, и морщины не восстанавливаются так естественно, как у натуральной кожи.
44. • ПВХ: На ощупь твердая и вяжущая, как пластик. Практически не имеет эластичности и восстанавливается медленно или даже остается неизменной после нажатия. Зимой становится тверже.
45. 3. Определите запах
46. • Натуральная кожа: Имеет естественный кожаный или легкий запах дубильного вещества, который не является резким.
47. • ПУ/П
4. Examine the Cross-Section
• Genuine Leather: A cross-section reveals a fibrous structure, composed of dense yet irregular fibers, with a visible transition from the surface to the inner layers.
• PU/PVC: A cross-section clearly reveals the layered structure. The bottom layer is a fabric base (such as cotton or non-woven fabric), with a foam layer and surface coating above. It lacks the natural, fibrous feel.
Comprehensive analysis of common leather damage types
- Friction from sharp objects (such as keys, zippers, and walls). Minor scratches can damage the surface coating, while severe scratches can puncture the leather.
- Leather subjected to heavy objects and held in the same position for extended periods can cause dead creases.
- Oil, water, dye transfer, and other stains that penetrate the leather surface can damage the surface coating.
- Color fading. Prolonged exposure to sunlight can cause the leather dye to break down, resulting in a lighter or even yellowing color.
- Lack of maintenance in dry environments can cause the leather to harden, lose its elasticity, and eventually crack at bends.
- Mold. Leather is susceptible to mold growth in damp, poorly ventilated environments, resulting in surface mildew. Mold can eat away at the leather, causing permanent stains.
Surface scratches and wear
In daily use, leather products, such as leather clothes and leather pants, often come into frequent contact with tables, benches, leather sofas, furniture, and other objects, causing the coating to disappear. Over time, it may become brittle or crack. Avoid contact with sharp objects. This type of damage mainly affects the outermost coating and dyeing layer of the leather, and usually does not damage the fibrous tissue of the dermis. Therefore, its severity is relatively low. Through professional cleaning, color touch-up, and coating repair, most surface scratches and wear can be well repaired and even restored to their original state.
Deep cuts, lacerations, and lacerations
If the leather is torn due to excessive force caused by a sharp object, this is a serious injury. This damage has penetrated the surface coating, cut the collagen fibers in the dermis, and destroyed the overall structural integrity of the leather. This is a serious injury. The repair process is relatively complicated and usually requires reinforcement from the back of the leather (applying a reinforcement sheet), then filling the gap with leather filling paste, and finally polishing, coloring and texture pressing. Although it can be repaired, it usually still leaves a mark when observed closely, like a “scar”.
Aging, cracking and peeling
Over time, due to prolonged lack of care and environmental influences, leather will dry out, crack, age, loosen, and oxidize. This is a structural breakdown of leather from within. Dry collagen fibers become brittle and break rather than stretch when subjected to stress. Peeling is essentially the separation of the finish from the severely damaged leather base. Extensive cracking and peeling signify the end of the leather’s lifespan. Repair is of little use because the base has lost its support. This is a highly serious injury, and prevention (regular cleaning and conditioning) is crucial.
Stains, stains and discoloration
This is chemical damage. When oil, water, or dye transfers to leather, it creates stains and stains on the surface. The damage occurs when foreign pigment molecules penetrate the leather’s surface or react with the leather’s original dye. The severity of this damage varies widely. Fresh surface stains and minor stains can be removed with specialized cleaners. However, deeply penetrated oil and ink stains, as well as discoloration caused by chemicals, are often permanent. Repairing this type of problem often requires re-dying the entire leather surface to achieve a uniform color.
Cigarette burns and thermal injuries
It is usually caused by falling cigarette butts, lighters or high-temperature objects, which will cause the surface to shrink, harden, turn black or carbonize, and the surface texture will disappear to form a bumpy shape. The high temperature causes the collagen fibers of the leather to undergo irreversible denaturation, just like raw meat being roasted. The structure of the leather is completely destroyed at the point of contact. This is an extremely serious and permanent damage. Since the material of the damaged area has changed fundamentally, conventional cleaning and coloring methods are completely ineffective. The only repair method is “surgical”: completely dig out the hardened part of the burn, then fill it with filling material, and then perform complex texture imitation and coloring. This kind of repair requires extremely high technicians, and it is difficult to achieve perfection.
The Art of DIY Repair: Home Solutions for Minor Damage
Minor damage caused by the use of leather products in daily life can be repaired by DIY, saving unnecessary costs, choosing the right repair tools and understanding the repair guide.

The Essential DIY Leather Restoration Toolbox
For leather DIY repair enthusiasts who want to do it themselves, a set of suitable leather repair tools is necessary. We have listed a series of items for dealing with stains, dyes, etc. to help you better DIY repair leather products.
Leather Cleaners and Conditioners
Cleaners are suitable for stains or oil stains on the leather surface, but not for absorbent leather, suede leather, nubuck leather, aniline leather, semi-aniline leather or after repair. Choose one that does not contain ammonia, phosphates or ozone-depleting chemicals, is non-flammable, soluble in fresh or salt water, and can be stored at room temperature.
Leather filling paste (wound repair paste) and adhesive
Filling paste is a special flexible colored filling paste used to cover cuts, holes or cracks in leather and synthetic leather, forming a soft, sticky and flexible layer
Reinforcement gaskets and backing materials
This tool can be used as a key material to reinforce and support the back of the damaged area during leather damage repair, providing it with a stable and solid base for subsequent filling and coloring repairs.
Leather Dye and Color Matching Kits
Whether you use it for leather sofas, wallets, leather dye is the best choice, it has penetrating, which means the dye will be absorbed by the leather and dye it, it has a dry even, easy to blend, can create attractive intermediate tones
Repair guide for minor scratches and scuffs
When leather products are damaged, our brains should not lose their way and try to repair them in the wrong way. We must search for professional answers from Google, such as how to repair sofa leather, how to repair clothing leather, and other related issues to avoid unnecessary losses.
Use leather care oil or mink oil to nourish and repair
Leather care oil deeply nourishes, which is equivalent to applying a layer of moisturizer to dry skin, making the leather fibers become plump, full and soft again. Then the elasticity of the leather will return to its original state, and the color will naturally deepen slightly and become more uniform.
Use the same color shoe polish or leather repair pen to touch up the color
When the previous step cannot completely remove the marks, we need to touch up the color with the same color shoe polish, which is mainly made of a mixture of wax, oil and dye. The wax and oil with a trace of dye penetrate and adhere to the leather surface, playing a temporary touch-up, covering and polishing effect. It is not a permanent “paint”; the repair pen can be called a paint pen, which contains a high-concentration, high-adhesion pigment. When using it, you need to understand that directly using opaque pigment to cover the scratches or wear to form a new layer of color coating.
Dealing with Cuts and Tears: Precision Repair Techniques
Repairing leather cuts and tears is one of the most demanding projects in DIY repair technology. It requires the leather products to maintain their original beauty and characteristics after repair. This is a very challenging repair process.

Preparation: Clean the wound edges
First of all, before repairing, we need to remove stains and other dirt from the damaged area of the leather product to ensure it is clean, and then use scissors to fine-tune the damaged edges.
Repair from the inside using leather glue and shims
Cut a piece of backing material 1-2cm larger than the wound to avoid covering the surrounding injured area
How to accurately place the back spacer
Use tweezers to carefully push the shim under the leather through the cut or tear. Using the other end of the scraper or tweezers, push the shim completely flat under the leather through the opening, making sure it covers the entire back of the wound area without any wrinkles.
Correct use of glue and fixing techniques
• Applying Glue: Use a small scraper or toothpick to apply a small amount of leather glue. Insert it through the opening and evenly apply it to the backing material and the backing of the leather around the edges of the cut.
• Precise Alignment: This is the most skill-intensive step. Immediately, gently press the two sides of the cut onto the glued backing, like a puzzle piece. Your goal is to create a minimal, almost seamless gap between the cuts. Use your fingertips to gently adjust the alignment until you find the perfect fit.
• Press and Secure: Once aligned, press the cut from the front of the leather to secure it to the underlying gasket. Masking tape can be used to hold the cut tight to prevent shifting during drying.
• Cleaning Spills: Immediately wipe away any glue that leaks out of the gap with a damp cloth.
• Complete Drying: Allow the glue to dry and cure completely according to the glue instructions. At this point, the leather’s structural strength has been largely restored.
Filling and leveling: making repairs invisible
• Initial Filling: Use a small scraper to apply a small amount of leather filler. At a 90-degree angle, perpendicular to the seam, firmly press the filler into and across the seam. This ensures that the filler completely fills the deepest part of the seam.
• Filling in Layers: Filler shrinks slightly as it dries. Therefore, apply the filler in 2-3 thin coats, allowing each coat to dry completely (this can be accelerated by using a hair dryer on low). The final coat should be slightly above the surface of the leather to allow for sanding.
Dealing with Cuts and Tears: Precision Repair Techniques
This is a terminal illness of artificial leather. It occurs when the plasticizers (chemicals that keep the material flexible) in the plastic layer evaporate, causing the plastic to become brittle, crack, and delaminate (peel) from the underlying fabric.
This damage is irreversible. There’s no way to restore brittle plastic to its original flexibility. Repair efforts aim to delay the damage and conceal its appearance.

Deep Cleaning and Oiling: Restoring Leather's Flexibility
Use a specialized, pH-neutral leather cleaner with a soft brush and towel to thoroughly remove dirt and old care product residue from deep within the leather’s pores and grain. This step opens the skin’s pores and prepares them for absorption of nutrients.
After the leather has completely dried, apply a high-quality leather conditioning oil or a more penetrating leather rejuvenator in small, frequent, and even applications. Allow the leather ample time (several hours or even a full day) to fully absorb the oil.
Fill cracks with flexible filler
After stabilization, the leather has become flexible, allowing the filling material to work with it. When the leather bends, the filler stretches with it rather than tearing. Applying filler directly to stiff leather would inevitably cause both the filler and the leather to crack again.
When choosing the right filling paste, be sure to look for products labeled “flexible” and “leather-specific.” These products are specially formulated to maintain excellent elasticity and adhesion after drying.
Repaint and seal the entire structure to restore its gloss.
• A careful repair technique requires using a small, flexible scraper, palette knife, or the edge of an old credit card before repairing.
• Start by applying a small amount of filler across the crack at a 45-degree angle. The key is to apply it horizontally or diagonally across the crack, rather than along it. This effectively packs the filler into the deepest part of the crack.
• Applying small amounts frequently is crucial. Avoid applying a large amount of filler at once. The correct technique is to apply the filler correctly: a thin first coat is applied to fill the base of the crack. Subsequent coats are applied thinly as needed, followed by a second and third coat. Since filler shrinks slightly as it dries, layering the filler creates the smoothest, strongest finish. The final coat should be slightly raised above the surrounding leather surface to allow for sanding.
• Allow to dry, ensuring each layer is completely dry before proceeding. Wet filler will be “ripped” during sanding, undoing all the work.
Cleaning and treatment of stubborn stains
This is a very patient treatment method, and the surrounding leather should not be damaged during the treatment.

Strategies for Different Types of Stains
Before treatment, you need to clearly know the type of stains and the different treatment methods for different types of stains to avoid damaging the leather. We will share them with you in several categories.
Removal of oily and fatty stains
These stains penetrate deep into the leather’s fibers, requiring you to absorb the oil rather than simply scrubbing it off.
• Powder absorption: You can use cornstarch, baking soda, or talcum powder.
• Quickly absorb excess surface oil with a paper towel. Sprinkle a thick layer of powder over the stain, completely covering it. Let it sit for several hours. The powder’s porous structure will act like a sponge, slowly drawing out the oil from deep within the leather. Finally, scrub the powder off with a soft brush and observe the results. If the stain persists, repeat the above process or use another method.
The Challenge of Ballpoint Pen Marks and Ink Stains
This is one of the most difficult stains to treat. We recommend that you buy a leather-specific ink remover. They are more effective and less damaging to the leather. They are usually in pen or gel form and can act on the stain more accurately.
Treatment of water stains and mildew
This is one of the most difficult stains to treat. We recommend that you buy a leather-specific ink remover. They are more effective and less damaging to the leather. They are usually in pen or gel form and can act on the stain more accurately.
Treatment of water stains and mildew
The logic: The edge of a water stain is noticeable because the localized moisture disrupts the distribution of oils and dye in the leather. The solution isn’t to “erase” the stain, but to evenly moisten it to eliminate the “edge.”
• Materials: Clean sponge, distilled water
• Using a slightly damp (no wrung-out) sponge, start at the center of the stain and gently rub in circular motions outward.
• Gradually wet the surface until the entire leather panel is covered (for example, the entire side of a bag or the entire seat of a sofa, bordered by the seams).
• The goal is to achieve an even darkening of the color across the entire panel, eliminating a noticeable “water stain edge.”
• Allow the leather to air dry naturally and slowly in a cool, well-ventilated area. Avoid direct sunlight or heat.
• Once completely dry, the water stain will usually disappear or become much less noticeable.
Using Professional Leather Cleaning Products and Techniques
The core of professional cleaning is treating leather like skin, requiring systematic care, rather than just another surface. Household cleaners (dishwashing liquid, glass water, all-purpose cleaners) are a complete no-no, as their pH, solvents, and chemical content can damage the leather’s protective layer and drain the natural oils it relies on.
1. Have a Professional Toolbox
A. Professional Cleaning Products (The Cleaners)
a) Mild Leather Cleaner:
• Form: Typically a liquid spray or water-based solution.
• Uses: For daily cleaning, regular care, and light stain treatment. This is a workhorse in your toolbox.
• Features: Neutral pH and a mild formula that removes surface stains without damaging the leather’s coating.
b) Strong/Foaming Leather Cleaner:
• Form: Typically a foaming solution or a concentrated solution that requires water to create a foam. • Uses: Treats heavily neglected leather with age-old stains (such as used car seats and old furniture), or deep cleans before refinishing.
• Features: Enhanced cleaning power, with foam that effectively lifts dirt from the deep grain of the leather, making it easier to remove.
c) Saddle Soap:
• Form: Classic, hard paste.
• Description: This is a traditional, very strong cleaning and maintenance product containing detergents and oils/waxes. While effective, it is not recommended for modern, delicate furniture or handbag leather. It is more suitable for durable leather such as saddles and boots. Improper use can darken the leather and clog its pores.
B. Professional Cleaning Tools
Horsehair Brush:
• A must-have tool! It’s even more important than the cleaner itself.
• Why: Horsehair has just the right consistency—hard enough to penetrate the leather’s pores and grain to dislodge dirt, yet soft enough not to scratch the surface. • Recommendation: Prepare two: one for cleaning (which can get dirty) and one for polishing.
Microfiber Cloths:
• Essential! Prepare at least three.
• Why: Highly absorbent, soft, and lint-free.
• Uses: One for wiping away foam and dirt after cleaning, one for drying, and one for applying and polishing care products.
Applicator Pad:
• For evenly applying leather care oil or protectant after cleaning.
2. Professional Cleaning Techniques
Step 1: Dry Preparation
Before applying any liquids, perform a dry cleaning.
• Dry Brushing: Use a horsehair brush to thoroughly and carefully brush every nook and cranny of the leather.
• Purpose: Removes all surface dust, grit, and debris. If this step is skipped, subsequent wet cleaning can turn these particles into “abrasive mortar,” causing microscopic scratches in the leather. Step 2: Wet Cleaning
• Testing: Test your cleaner on a hidden area to ensure it won’t cause discoloration or any other adverse reactions.
• Applying the Cleaner Correctly: This is the difference between a professional and a not-so-professional—never spray the cleaner directly onto the leather! This will oversaturate the area and leave watermarks.
• The Right Method: Spray the cleaner onto a horsehair brush or pour it onto a damp microfiber cloth.
• Agitate and Lather: Using a horsehair brush with the cleaner, scrub the leather surface in gentle, overlapping, circular motions. You’ll see a fine lather form. This lather entraps and “suspends” dirt deep within the leather’s grain.
• Zone Treatment: Divide the leather surface into several small areas (e.g., a seat cushion, a backrest) and clean each area individually to ensure even treatment and prevent the cleaner from drying out. Step 3: Wiping & Drying
• Dirt Removal: Use a clean, slightly damp microfiber cloth to wipe away any foam and dislodged dirt.
• Blotting: Immediately use another completely dry microfiber cloth, gently pressing and wiping the cleaned area to remove any remaining moisture.
• Air Drying: Allow the leather to air dry in a cool, well-ventilated area. Do not use a heat generator or direct sunlight.
• Step 4: Conditioning & Protecting
This is an essential step. The cleaning process strips the leather of some of its natural oils, which must be replenished promptly to prevent it from becoming dry and stiff.
• Confirming Dryness: Ensure the leather is completely dry from the cleaning process (usually 1-2 hours).
• Apply Evenly: Apply a small amount of high-quality leather conditioner/oil to a sponge or clean cloth. • Thin Layer Conditioning: Apply a thin, even layer to the leather surface using circular motions. Don’t overdo it; leather can only absorb so much.
• Let the Conditioner Absorb: Allow the conditioner to sit on the leather surface for a period of time (usually 30 minutes to several hours, depending on the product instructions) to fully penetrate.
• Final Polishing: Use a new, clean microfiber cloth or a specialized horsehair buffing brush to quickly and gently buff the leather surface. This will remove excess conditioner and restore the leather’s natural, radiant shine.
After completing this process, your leather will not only be as clean as new, but more importantly, its health and flexibility will be preserved and enhanced.
Color Restoration for Faded and Discolored Leather
Repairing faded and discolored leather is not as simple as just painting. It requires professional polishing and color matching technology to restore the original luster and color of leather products. It is more like a reshaping process, rebuilding a new, colored, flexible coating on the original damaged coating of the leather.

Surface preparation before repair: degreasing and light sanding
Before repairing, cleaning and oiling are necessary. Any professional repairer will tell you that 90% of repair failures (such as peeling or flaking of the color layer) are due to inadequate handling in this step.
Step 1: Degreasing
1. Why is degreasing necessary?
During use, leather inevitably absorbs various oily contaminants. These oils are the number one enemy of a new finish:
• Human oils: Oils secreted by skin and hair accumulate in high-contact areas such as armrests, headrests, steering wheels, and belts.
• Care product residue: Cheap, improperly made care products containing silicone or wax can form a barrier film on the leather surface.
• Environmental oils: Such as kitchen fumes and cosmetics.
These oils can severely hinder the adhesion of subsequent fillers and color coats. Just as you can’t stick tape to a greasy dish, no repair material will bond securely to a greasy leather surface.
2. When is degreasing necessary?
• Degreasing is essential before any filling or coloring work. • For heavily oiled areas (such as those on sofa headrests that have darkened and become shiny black), degreasing is the most critical step in the restoration process.
3. How to Perform Professionally?
Degreasing is a more intensive treatment, following the “deep cleaning” we discussed earlier.
a) Product Selection:
• Professional Leather Degreaser (Leather Prep): This is the best choice, formulated specifically for leather to effectively remove oil without causing excessive damage.
• Isopropyl Alcohol: 75% rubbing alcohol is an effective alternative, but should be used with caution as it is highly volatile and may remove more of the original color.
b) Procedure:
1. • Нанесите обезжириватель или спирт на чистую, белую, безворсовую ткань (никогда не наносите непосредственно на кожу).
2. • Приложите умеренное давление к целевой области, быстро и равномерно. Вы можете заметить, что на ткань переходит грязь и цвет — это нормально, так как удаляется нестабильное, старое покрытие, загрязненное маслом. • Продолжайте менять чистую сторону ткани, пока перенос цвета или грязи не станет незаметным.
3. • Признаки завершения: Обработанная область временно потеряет свой блеск, приобретет матовый, слегка шероховатый вид и даже будет ощущаться «скрипуче» чистой на ощупь. Это указывает на успешное удаление масляного барьера.
4. • Дайте растворителю полностью испариться (обычно в течение нескольких минут).
5. Часть 2: Легкая шлифовка
6. 1. Зачем нужна шлифовка?
7. Обезжиривание решает проблему «химической адгезии», а шлифовка — «физической адгезии».
8. • Увеличение площади поверхности: На микроскопическом уровне шлифовка создает бесчисленные крошечные бороздки, пики и впадины на гладкой поверхности кожи, значительно увеличивая площадь поверхности.
9. • Создание «механического замка»: Последующий наполнитель и краситель могут проникать в эти крошечные бороздки. После высыхания и отверждения они действуют как бесчисленные крошечные крючки, образуя надежный «механический замок» с поверхностью кожи.
10. • Сглаживание переходов: Ее можно использовать для сглаживания краев наполнителя, бесшовного смешивания его с окружающей кожей и устранения любых неровностей.
11. 2. Когда необходима шлифовка?
12. • После заполнения, перед окрашиванием: Это наиболее распространенное применение. Используется для сглаживания высохшего наполнителя.
13. • После обезжиривания, перед окрашиванием: Для некоторых очень гладких, плотных кож (например, наппы) очень легкая общая шлифовка после обезжиривания может разрушить исходное гладкое покрытие и значительно улучшить адгезию нового слоя краски.
14. 3. Как это сделать профессионально?
15. Ключевое слово здесь — «легкая». Цель — создать микроскопическую шероховатость, а не видимые царапины.
16. а) Выбор инструмента:
17. • Наждачная бумага с высокой зернистостью: Это абсолютно критично. Используйте ультратонкую наждачную бумагу с зернистостью 800-1500. Для особо деликатных работ можно использовать даже зернистость 2000. Никогда не используйте наждачную бумагу с низкой зернистостью, грубую!
18. • Шлифовальная подушечка: Оборачивание наждачной бумаги вокруг небольшой мягкой подушечки обеспечивает равномерное давление при шлифовке.
19. б) Техника:
20. • Давление: Применяйте легкое, невесомое давление. Думайте о себе как о «пылящем», а не о «шлифующем».
21. • Метод: Используйте нежные круговые или прямые движения.
22. • Цель: Просто «припудрить» блеск поверхности кожи. Вы стремитесь к ровному, матовому покрытию, которое гладко на ощупь.
23. • Очистка: После шлифовки крайне важно тщательно удалить всю шлифовальную пыль чистой тканью или тканью, слегка смоченной спиртом. Любая оставшаяся пыль будет выглядеть как дефект под новым покрытием.
24. После завершения этапов обезжиривания и легкой шлифовки вы получаете профессиональную основу, идеально подходящую для любого реставрационного продукта. Это путь к «безупречной» реставрации и одно из наиболее существенных различий между любительской и профессиональной реставрацией.
25. Как выбрать и смешать правильные цвета
26. Часть 1: Выбор правильного пигмента. Выбор неправильного пигмента может привести к неудаче, даже при правильном цвете.
27. 1. Тип продукта: Водно-дисперсионная полиуретановая (ПУ) цветная паста
28. • Обязательный выбор: Профессиональные цветные продукты для реставрации кожи на рынке почти все основаны на водно-дисперсионной полиуретановой смоле. Это гарантирует, что отремонтированное покрытие обладает следующими ключевыми свойствами:
29. • Гибкость: Способность изгибаться и растягиваться вместе с кожей без растрескивания.
30. • Долговечность: Устойчивость к трению при ежедневном использовании.
31. • Адгезия: Надежное сцепление с правильно подготовленными кожаными поверхностями.
32. • Безопасность: Водно-дисперсионные формулы имеют низкий запах, более безопасны и экологичны, чем продукты на основе растворителей.
33. Категорически избегайте: Стандартные акриловые краски для художников, масляные краски и модельные краски. Эти продукты становятся жесткими и хрупкими после высыхания и могут быстро трескаться и отслаиваться на коже.
34. 2. Форма продукта: Наборы против готовых смешанных цветов
35. • Реставрационные наборы (рекомендуется): Обычно включают пять основных цветов: черный, белый, красный, желтый и синий, а также распространенные цвета, такие как коричневый и охра, и регуляторы блеска.
36. Плюсы: Позволяет смешивать теоретически любой цвет, предлагая наибольшую гибкость и делая это единственным вариантом для профессиональной реставрации.
37. Минусы: Требует определенного уровня теории цвета и терпения.
38. • Готовые смешанные цвета: Готовые смешанные цвета для конкретных брендов (например, для определенных цветов автомобильных сидений).
39. Плюсы: Готовы к использованию прямо из коробки, очень удобно.
40. Минусы: Даже «оригинальные» цвета не могут гарантировать точное совпадение с вашей кожей, которая выцвела за годы. Цвет кожи может уникально меняться из-за воздействия солнца, использования и других факторов.
41. Часть 2: Смешивание правильного цвета
42. 1. Деконструкция цвета
43. • Внимательно изучите свою «целевую цветовую палитру» и проанализируйте ее основные цветовые компоненты.
44. • Например, типичный «коричневый» цвет может состоять из значительного количества белого, охры, небольшого количества красного и следового количества черного. Цвет «слоновой кости» может быть на 98% белым, с оттенком желтого и оттенком охры.
45. 2. Начинайте со светлого, добавляйте темный (Start Light, Add Dark)
46. • На палитре или в небольшой емкости всегда начинайте с самого светлого, самого щедрого цвета. Для большинства цветов это означает начало с белого.
47. • Затем, используя пипетку или зубочистку, добавляйте другие цвета по капле. Тщательно перемешивайте после каждой капли.
48. • Ключ: Затемнить цвет легко, но осветлить уже темный цвет требует добавления большого количества белого, что расточительно и трудно контролировать.
49. 3. Тест и сушка (Образец)
50. • Когда вы думаете, что цвет «выглядит примерно правильно», используйте небольшой шпатель или ватный тампон, чтобы нанести небольшое количество смешанного цвета на скрытую, незаметную область кожаного изделия (или на кусок белой бумаги рядом с вашим целевым цветом).
51. • Немедленно высушите этот небольшой образец феном на низкой температуре!
52. • Сравните высушенный образец с вашей «целевой цветовой палитрой».
53. 4. Анализ и корректировка
54. • Слишком светлый? Какого цвета не хватает? Недостаточно ли он темный в целом (добавьте немного черного или его дополнительного цвета) или недостаточно красный (добавьте немного красного)?
55. • Слишком темный? Это сложно; вам нужно будет взять больше базового светлого цвета и смешать в нем небольшое количество цвета, который вы только что затемнили.
56. • Неправильный оттенок? Например, если вы стремитесь к
5. Repeat the Cycle
• Repeat the cycle of “Adjust → Stir → Test → Dry → Compare” until you’re satisfied with the color match after drying. This process may take 5 to 10 cycles or more; patience is the key.
Techniques for even color application: sponge, airbrush, or brush?
It directly impacts the aesthetic success of a restoration. Even the most perfectly blended colors can be ruined by the wrong application tools and techniques. Choosing a sponge, airbrush, or brush depends on the area of your restoration, the desired effect, and the equipment available. Below, we’ll provide a detailed comparison and analysis of these three tools.
1. Sponge – Versatile, Easy to Use, Natural-Looking Results
Sponges are the most commonly used and reliable hand-applying tool in professional restoration, especially suitable for DIY enthusiasts and most restoration scenarios.
• Applications:
Almost all applications, from covering small scratches to extensive color changes.
Particularly suitable for leathers with natural grain, such as pebbled and tumbled leather.
• Advantages:
Easy to control: You can precisely control the amount of paint applied and where it’s applied.
Avoid brush marks: Applying paint by dabbing, rather than wiping, completely eliminates the problem of brush marks. Simulating Grain: The pressing motion creates a natural, slightly bumpy, dotted texture that mimics the leather’s natural pores and grain, making the repaired area blend more easily into the surrounding area.
Cost-Effective: Sponges are inexpensive and readily available.
• Disadvantages:
Low Efficiency: For very large areas (such as an entire sofa), applying color by hand through pressing can be very time-consuming.
Uniformity Limits: While the effect is natural, achieving the absolutely smooth, mirror-like finish of an airbrush is difficult.
• Pro Tips:
“Dry” Sponge, “Wet” Material: Using a slightly damp sponge (wrung out all the water) allows the color to be applied more evenly, rather than being absorbed all at once by the dry sponge.
“Dip-Press-Lift”: After applying a small amount of color, press it onto cardboard to remove any excess paint. Then, press the leather in gentle, vertical, and quick strokes, lifting distinctly with each stroke to avoid dragging. Edge Feathering: When applying a localized repair around the edges, apply gentle pressure to create a natural, pixelated transition (gradient) between the new and old colors, rather than a harsh line.
Multiple, Thin Coatings: Always apply multiple, thin coats, thoroughly drying with a hairdryer between each coat.
2. Airbrush – Extremely Even, Highly Efficient, and the Professional Choice
The airbrush is the ultimate tool for achieving “factory-quality” restoration results. It uses compressed air to atomize the color into extremely fine particles, applying them evenly to the leather surface.
• Suitable Applications:
Large-area color restorations and full-scale color changes (such as entire car seats, sofas, and leather garments).
High-end restorations that strive for an extremely smooth, smudge-free finish.
Repairing subtle color transitions or “gradients.”
• Advantages:
Absolutely Even: Creates the smoothest, most even coat of color, without any contact marks.
Extremely Thin Coatings: Applying a very thin coat maximizes the preservation of the leather’s fine grain. Highly Efficient: For large areas, it’s significantly faster than any other hand-painting method.
Easy Transitions: Soft color transitions and feathering effects can be easily achieved.
• Disadvantages:
Equipment Required: Requires a complete set of equipment, including a spray gun and air pump (compressor), resulting in a high initial investment.
Technique Required: Mastering the right combination of spray distance, air pressure, and paint output to avoid runny, overspray, and orange peel is challenging.
Preparation Required: Masking tape and film are required to carefully protect all areas not to be sprayed (such as seams and hardware), which is very time-consuming.
• Pro Tips:
Filtering Pigments: Always filter the mixed color through a strainer before use to prevent any small particles from clogging the spray gun.
“Wet Spraying” Technique: Maintain a suitable distance (usually 15-20 cm) and move the spray gun at a steady speed, ensuring that each subsequent spray covers 1/3 to 1/2 of the edge of the previous spray, creating a continuous, wet coat. Corners first, then back: Spray hard-to-reach corners like seams and folds first, then spray flat, large surfaces.
3. Brush – For fine detailing only
A brush is a very specialized tool for leather color restoration and should never be used for large areas.
• Applications:
Repairing color wear along seam edges.
Adding color to carved leather sculptures.
Instrumenting fine patterns or repairing small, point-shaped damage that is difficult to reach with a sponge.
• Advantages:
Ultimate precision: Allows precise color control over even the smallest details.
• Disadvantages:
Prone to brush marks: Use on any flat surface will leave noticeable, unnatural brush marks.
• Pro Tip:
Choose a soft brush: Use a high-quality, soft-bristled watercolor or modeling brush.
Follow the grain: If you must apply to a textured surface, apply in the direction of the leather’s grain.
Diluting paint: Dilute the paint appropriately to minimize the visibility of brush marks.
Color fixing and gloss treatment: lock in perfect color
If you compare the previous steps of cleaning, filling, and painting to the sheet metal and paint job of a classic car, then this final step is the application of a crystal-clear, indestructible layer of clear coat. It not only determines the final gloss and texture, but also acts as a protective shield for all your hard work, ensuring the restoration remains pristine for years to come.
Part 1: Why is this an essential final step?
This step fulfills two core missions: functionally protecting the color and aesthetically restoring the finish.
A. Color Fixing & Protection
Although the water-based color layer we applied previously is flexible and adheres well, its inherent resistance to abrasion, stains, and water is limited. A high-quality clear topcoat (sealer) provides crucial protection:
• Abrasion resistance: It forms a tough physical barrier that resists the friction of daily use, preventing the color from being easily scratched or rubbed onto clothing. • Stain Resistant: It seals the micropores of the color layer, effectively resisting the penetration of water, oil, and other stains.
• Fade Resistant: Many professional topcoats contain UV inhibitors, which slow down the fading of the color caused by sunlight.
• Uniform Touch: It provides a smooth, natural leather feel, not a “painted” feel.
Simply put, without this step, your color repair is just a fragile “temporary makeup”; with this step, it becomes a durable “permanent tattoo.”
B. Gloss Treatment & Restoration
This is the art of determining whether the repair is “invisible.” Natural leather has a unique sheen, ranging from a completely matte finish to a shiny gloss.
• Matching is key: If your sofa has a matte finish, but the repaired area has a glossy finish, the “patch” will be very noticeable, even if the color is accurate. • Gloss Options: Professional finish products typically offer a variety of gloss options:
• Matte: Completely non-reflective, suitable for many modern furniture, car interiors, and bags.
• Satin/Semi-gloss: The most common gloss, with a subtle, warm, natural sheen.
• Gloss: Highly reflective, often seen on patent leather or certain styles of leather goods.
Your goal isn’t to “brighten” the leather, but to achieve a 100% match between the gloss of the repaired area and the original gloss of the surrounding undamaged area.
Part 2: How to Do It Professionally
1. Preparation
• Dry Thoroughly: Ensure the final coat of color is completely and thoroughly dry. Ideally, wait at least 4-6 hours, or even overnight. Applying finish over wet color can cause the color to bleed, with disastrous results.
• Clean the Surface: Gently wipe the surface with a clean, dry cloth to ensure the painted surface is free of any dust particles. 2. Product Selection and Application
• Product: Choose a water-based leather finish that matches the brand of color you’re using to ensure optimal chemical compatibility.
• Tools: A clean sponge, spray gun, or high-density foam brush.
Application Tips (using a sponge as an example):
• Thin coats are king: As with paint, applying multiple, thin coats is far more effective than a single, thick coat. Aim for two to three thin, even coats.
• Stroke-wise application: Pour a small amount of finish onto a slightly damp sponge. Unlike the “pressing” motion used when applying paint, apply finish using a smooth, unidirectional “wiping” motion. For example, from left to right or from top to bottom, each coat slightly overlaps the edge of the previous one. This minimizes smearing and creates the smoothest possible finish.
• Dry between coats: Immediately dry each coat with a hair dryer on low or cool air. Once it feels tacky to the touch, apply the next coat.
3. Final Curing: The Most Important Wait
This is the most easily overlooked, yet crucial, point.
• The Difference Between “Drying” and “Curing”:
• Dry to Touch: This refers to the evaporation of moisture from the coating, leaving the surface tack-free. This process is quick, taking only a few minutes with the help of a hair dryer.
• Cured: This refers to the complete chemical cross-linking within the coating, achieving its designed final hardness, abrasion resistance, and chemical resistance. This process is much longer.
• Curing Time: Depending on the product and the ambient temperature and humidity, a full cure typically takes between 24 hours and 7 days.
• Precautions During This Period: Before the repaired leather is fully cured, while it can be used, its protective layer is still fragile. Avoid:
• Scratching with fingernails.
• Deep cleaning or the use of any chemicals.
• Prolonged heavy pressure or severe friction.
Once you have patiently waited for the curing period to complete, your leather repair is officially complete. Not only do you restore its appearance, you also give it a strong layer of protection, so that this perfect color can be locked in for a long time
Restoration Considerations for Special Leather Goods
For different types of repair considerations, we need to first identify the type of leather. In special leathers, especially expensive luxury goods, if the treatment is wrong, the damage will be permanent. If you are not sure, it is recommended to consult a professional leather care technician.
Leather coats and jackets: focus on softness and mobility
Extremely high flexibility is the best requirement for leather jackets and leather pants. Leather jackets are worn on the body and need to bend, stretch and fold continuously and over a large range with the body. The collar and cuffs are the places that are most touched by body oil, which will absorb a large amount of secreted oil, causing the color to darken and the leather to harden. In addition, the environment also affects the leather. In the case of high temperature, sun, rain and extremely low temperature, the leather jacket will bend, stretch and fold continuously and over a large range with the body.
Restoration Product Priorities
Flexibility is the top priority: All restoration products selected, from fillers and color correctors to the final finish, must be highly flexible.
Degreasing Key Areas: When repairing collars and cuffs, thorough degreasing is the first step that determines success. Use a professional degreaser and repeatedly wipe until a clean, matte finish is achieved.
Topcoat Selection: A semi-gloss or matte finish is typically chosen to complement the natural texture of the leather. The finish should also be resistant to abrasion.
Regular Maintenance: Leather’s life depends on its maintenance. Even if it’s not damaged, it should be cleaned and oiled seasonally to maintain the fiber’s flexibility and prevent cracking.
Professional Tip: After the repair is completed, hang the leather on a wide hanger in a well-ventilated area to allow the repair material to fully cure without tension for at least 48-72 hours. This is crucial for achieving ultimate flexibility.
Leather sofas and furniture: Consider wear resistance and daily use
Key considerations for common problems:
High durability and abrasion resistance, requiring it to withstand prolonged sitting pressure, friction, and threats from keys, cat claws, and sharp objects.
Large-scale visual uniformity: The sofa is the centerpiece of the living room, and any local variations in color or gloss are highly noticeable.
Complex sources of contamination: Food, beverages, human and pet oils, and pen marks.
Ultraviolet radiation: Areas near windows can fade and age due to prolonged sun exposure.
Cracks, collapse, and severe fading in the seat and backrest due to prolonged pressure.
Darkening and stickiness in the armrests and headrests due to body oils.
Scratches and stains from pets.
Overall color dulling and unevenness due to age.
Restoration strategies and product selection:
Durability is the top priority: The choice of finish is crucial; a professional, abrasion-resistant, and scratch-resistant furniture leather finish is essential.
Precision in color matching: Extreme precision is required when matching colors. After restoration, the color difference between the new and old areas should be discernible under both natural and outdoor lighting.
Repair on a “surface-by-surface” basis: To avoid color discrepancies, even with minor damage, it’s recommended to clean and paint the entire panel (demarcated by the seams). Severely faded sofas often require a complete restoration.
Filling and Graining: Deep cracks and scratches require careful sanding after filling, and the paint should be applied using a sponge or specialized tools to reshape the grain to match the surrounding leather grain.
Pro Tip: Before any color restoration, confirm the adjusted color using the lighting (natural or outdoor) where the sofa will be placed.
Car leather seats: resistant to sunlight and temperature changes
Common Issues and Key Considerations:
Harshest Operating Environment: Subject to extreme temperature fluctuations (indoor car interiors can reach 70-80°C in the hot summer sun and freezing cold in the winter), strong direct UV rays, and high levels of daily wear and tear (especially on the driver’s side).
Industrial-grade durability standards: Car leather coatings are typically thicker and tougher than furniture leather.
Safety considerations: Repair materials must be flame retardant and must not produce harmful gases.
Specific gloss requirements: Almost all modern car seats have a matte or very low-gloss finish to reduce glare and reflections during driving.
Repair Strategy and Product Selection:
Abrasion resistance and UV protection are top priorities: Use repair products specifically formulated for car leather. Topcoats, in particular, must be clearly labeled as **high abrasion resistance and UV protection**.
Strict degreasing: Car seats, especially the driver’s seat, accumulate significant amounts of oil and sweat, requiring thorough, professional degreasing before repair.
Gloss matching is crucial: A matte topcoat must be selected. Any excess gloss will make the repair look cheap and unprofessional.
Color transfer treatment: For denim dyeing, clean the area with a specialized color transfer remover before considering recoloring.
Pro Tip: For severe wear on the side panels, consider applying one or two more coats of a high-abrasion finish than other areas. Be sure to avoid heavy abrasion on the area for at least 3-7 days after the repair to allow it to fully cure.
Luxury leather bags: meticulous restoration and value preservation
Common Problems and Key Considerations:
Value and Aesthetics: The core of restoration is to **preserve value** and **restore beauty**, requiring the highest level of precision and restoration.
Material Diversity: Delicate and exotic leathers such as aniline, calfskin, sheepskin, and even exotic leathers are often used.
Detailed Hardware and Stitching: All non-leather parts must be perfectly avoided and protected during restoration.
“Less is More”: Excellent luxury bag restoration strives for minimal intervention to maximize the preservation of the original texture and charm.
Wear and fading on the four bottom corners.
Darkening, blackening, and cracking of the handles due to sweat and oil.
Scratches on the front of the bag from fingernails or hard objects.
Deformation or indentations caused by improper storage.
Stains from handwriting or cosmetics on the lining.
Restoration Strategy and Product Selection:
Precision is the top priority: Color matching must be 100% accurate. Filling and polishing must be extremely smooth. Perfect Hardware Protection: Before painting, meticulously protect every piece of hardware, zipper, and logo with specialized masking tape and fluid.
Prioritize Special Leather Treatments: First, determine the bag’s leather type. If it’s aniline, waxed, or similar, standard procedures must be abandoned in favor of the specialized leather repair strategies discussed previously.
Special Handle Treatment: Restoring handles typically requires a deep degreasing process followed by a color refinish and multiple coats to protect against future oil damage.
Pro Tip: Never attempt a “total restoration” on a luxury bag to make it look “new” unless it’s a solid color and severely damaged. The best restoration is one that eliminates the damage while preserving the bag’s timeless, original charm.
Key points for repairing artificial leather (PU/PVC)
Before repairing faux leather, it’s important to understand that faux leather is not the same as genuine leather. It’s not like treating real skin, but rather a thin coating attached to a base fabric. Before repairing, forget about “nourishing” and focus on “surface engineering.” Remember the golden rules of repair:
Rule 1: Avoid oil-based care products. This is crucial and the most common mistake. Using any leather care oil, mink oil, or lanolin on faux leather will completely block the product, rendering it ineffective and potentially damaging.
Rule 2: Cleaning isn’t about absorption; it’s about removing all contaminants that could hinder the adhesion of subsequent glues, fillers, and color coatings, creating an absolutely clean base for repair. Therefore, choose a pH-neutral cleaner or a dedicated vinyl/plastic cleaner.
Rule 3: Bonding + Filling = Repairing Structural Damage: Use backing, specialized glue, and flexible fillers.
Rule 4: Embossing is key to invisible repairs.
Rule 5: Color repair is like painting, not dyeing.
Rule 6: Maintain a positive attitude toward cracking and peeling.
The difference between artificial leather and genuine leather repair
The difference between artificial leather and genuine leather repair isn’t the method, but the nature of the materials.
The core concept of artificial leather vs. genuine leather repair:
When repairing genuine leather, you act like a “dermatologist,” diagnosing and restoring the health and vitality of a natural biological material.
When repairing artificial leather, you act like a “polymer materials engineer,” rebuilding and beautifying a damaged industrial plastic surface.
| Repair phase | Genuine Leather | Artificial leather (PU/PVC) |
|---|---|---|
| Material Essence | Animal skin, composed of porous collagen fibers, is "alive". | The plastic layer (polyurethane/polyvinyl chloride) is laminated to the fabric base and is a "dead" industrial product. |
| Core restoration concept | Inside-out: Nourishes and restores fiber flexibility before treating the surface. | Outside-in: Treat only the surface, covering damage by gluing, filling and painting. |
| Aging/damage mode | The loss of internal oils causes the fibers to dry, stiffen, and crack. | The volatilization of plasticizers causes the plastic layer to become brittle, crack, and fall off/peel off from the fabric base. |
| Cleaning purpose | Removes impurities and opens pores to prepare them for absorption of treatment oils. | Remove dirt and create a 100% clean base to ensure glue and paint adhere firmly. |
| Care oil/nourishing products | Necessities. They are the "food" and "medicine" that restore their vitality and flexibility. | Absolutely no. It cannot be absorbed and will only float on the surface and become greasy, attract dust, and may even damage the plastic layer. |
| Filler | Leather Putty/Filling Paste: Designed to fill gaps between fibers and bond with leather fibers. | Vinyl/Flexible Filling Paste: Designed to create a new, smooth, flexible coating on a non-porous plastic surface. |
| Color Restoration | It is a combination of "coloring" and "micro-dyeing", and the color can be integrated with the surface fiber part of the leather. | Pure **"surface painting/coating"**, the color is completely covered on top of the plastic layer. |
| Key repair technologies | Deep oiling/fatting to soften the surface: This is the key to restoring its health and solving the root cause of cracks. | Retexturing/Embossed: This is the core of making the smooth repair area blend in with the surrounding embossed texture and achieve "invisibility". |
| Maintenance after restoration | Regular use of care oil is required for continuous nourishment to maintain its condition. | Using a vinyl/plastic protector essentially maintains a clean protective film without the need for "nurturing" |
| The fundamental goal of restoration | Rejuvenate: Allows the leather to recover its health and accept its natural signs of aging (Patina) | Concealing: Covering and beautifying the appearance of irreversible aging damage, which is damage control |
Effective methods for dealing with peeling and damage of artificial leather
Peeling of artificial leather is the ultimate result of aging and plasticizer loss, leading to brittleness. Therefore, our repair is not a “cure” but a “cover-up.” Our goal is to cover the damage visually, prevent further expansion, and restore functionality through a series of meticulous surface treatments.
Step 1: Assessment and Debridement
Before beginning, determine whether repair is feasible.
Small, localized peeling: This is ideal for repair.
Large, persistent powdering and shedding: This indicates the end of the lifespan of the entire material, making repairs less effective because new damage will quickly develop near the repaired area.
Procedure:
Debridement is key: Use tweezers and small scissors to clean all raised, loose, and flaking edges. Work until the edges are firm and no longer peel easily. Attempting to glue loose leather fragments back together is futile.
Cleaning and Degreasing: Use a mild detergent or diluted alcohol to thoroughly clean the damaged area and surrounding areas to remove dirt and grease, providing a clean surface for subsequent material attachment.
Step 2: Stabilizing the Edges
This is a critical step to prevent the damage from expanding.
Applying Glue: Use a toothpick or needle tip to apply a small amount of specialized flexible vinyl/plastic adhesive.
Fine Gluing: Carefully apply the adhesive just below the stabilized edge, between the plastic layer and the fabric backing.
Press Bond: Press the edge firmly down to re-bond it to the underlying fabric backing. Use clamps or a heavy object to hold it down and allow the glue to dry completely. You now have a secure “repair edge.”
Step 3: Filling & Leveling
Now we need to fill the “depression” created by the peeling.
Choose Filler: Use Flexible Vinyl Repair Compound. It remains flexible after drying and is compatible with PU/PVC surfaces. Filling in layers: Using a small, flexible scraper, apply a small amount of filler paste thinly to the damaged area, filling any depressions.
Be patient: Do not apply a thick coat all at once. Allow the first coat to dry completely according to the product instructions (use a hair dryer on low setting to speed up the process). If any depressions remain, apply a second coat.
Final leveling: After the final coat of filler, the surface should be flush with the surrounding original leather surface, or slightly higher, to allow for sanding.
Step 4: Sanding
This step ensures a seamless transition between the repaired area and the surrounding surface.
Choose sandpaper: Use fine sandpaper with a grit of 600 to 1200.
Gentle sanding: After the filler paste has fully cured, very gently sand the surface and edges of the repaired area until no seams or raised bumps are felt with your finger.
Clean up dust: Wipe away any sanding dust with a clean cloth.
Step 5: Color & Texture
This is the finishing touch to the restoration.
Color: Use a water-based PU/vinyl color corrector that matches the original leather color. Apply the color thinly and layered with a sponge, applying it with a pressure-sensitive sponge. Dry with a hairdryer between coats.
Retexture (Pro Tip): When the last coat of color is still slightly tacky and wet, take a sheet of grain paper (usually included in the restoration kit) and place it over the repaired area. Press firmly with a slightly heated tool tip or your fingertips to “copy” the texture onto the repaired surface. Upon peeling it off, the previously smooth repaired area will have a texture that matches the surrounding area, significantly improving the visual effect.
Step 6: Sealing
This is the final step to ensure the longevity of the restoration.
Applying a Topcoat: After the color layer is completely dry, apply 2-3 even coats of vinyl sealer/topcoat using a clean sponge or spray gun. Matching the Gloss: Ensure the gloss level (matte, semi-gloss, or glossy) of the selected finish matches the original leather.
Fully Curing: Allow the repaired item to rest for at least 24 hours to allow all materials to fully cure and achieve optimal strength and durability.
Cleaning and maintenance of artificial leather
Part 1: Cleaning Artificial Leather
A. Daily Cleaning (Frequent/Weekly)
This is the simplest and most important step, preventing dust and debris from accumulating and becoming stubborn, difficult-to-remove stains.
Tools: Dry, soft cloth (microfiber is best), soft-bristle brush.
Method:
Use a soft-bristle brush to gently brush away dust and debris from the surface and crevices.
Wipe the entire surface with a dry microfiber cloth.
For minor stains, gently wipe with a cloth dampened in clean water (wring thoroughly to remove any dripping water).
B. Deep Cleaning (Infrequent/Seasonal or As Needed)
When the artificial leather surface feels sticky, has noticeable stains, or appears dull, a deep cleaning is necessary.
Choose a Cleaner:
Best Choice: Purchase a commercially available cleaner specifically designed for vinyl or PU leather. A safe DIY option: Add a few drops of a mild, pH-neutral detergent (e.g., baby shampoo or bleach-free dish soap) to a bowl of warm water and stir until lathered.
Instructions:
Test: Test your cleaning solution in an inconspicuous area to ensure there are no adverse reactions.
Wet Wipe: Dip a microfiber cloth into the cleaning solution and wring it thoroughly until it is just damp, not soaking wet.
Zone Cleaning: Wipe the faux leather surface in small, defined areas with a damp cloth.
Treating Stubborn Stains: For deep stains, use a soft-bristled toothbrush to lather the cleaning solution and gently scrub in circular motions.
Residue Removal (Critical Step): Use a second, well-wrung cloth dampened with clean water to reapply to the cleaned area. This step removes any remaining detergent and prevents it from forming a film on the surface.
Dry Thoroughly: Immediately wipe away all moisture with a third, completely dry, soft cloth; do not allow the stain to air dry.
Part 2: Artificial Leather Maintenance
Artificial leather maintenance isn’t about re-oiling, but protection.
A. Physical Protection (Daily Essentials)
Avoid direct sunlight (UV Protection):
Reason: UV rays are the number one killer of artificial leather, accelerating the aging, brittleness, and fading of the plastic layer.
Action: For furniture, draw the curtains. For car seats, use sunshades when parking.
Avoid direct heat (Heat Protection):
Reason: High temperatures accelerate the volatilization of plasticizers, hardening the artificial leather and potentially causing the surface to melt and deform.
Action: Avoid placing artificial leather products near heat sources such as radiators, fireplaces, and heaters.
Avoid sharp objects (Scratch Protection):
Reason: Once the plastic coating of artificial leather is scratched, it’s almost impossible to fully repair.
Action: Be careful of keys, pet claws, rivets on clothing, etc.
B. Chemical Protection (Regular Operation)
This step is the closest to “maintenance” and aims to form a protective layer on the surface. Product Selection: Use a protective/dressing agent designed for artificial leather, vinyl, or plastic.
Product Benefits:
Provides UV protection, like applying sunscreen to leather.
Forms an antistatic coating on the surface, reducing dust attraction.
Increases surface slip and reduces friction, helping to resist minor abrasions.
Makes stains more difficult to adhere, making future cleaning easier.
How to Use:
Apply after deep cleaning and complete drying.
Spray a small amount of protective agent onto a clean sponge or soft cloth (do not spray directly onto the leather).
Apply an even, thin layer over the entire surface.
Allow to dry naturally or buff lightly with a dry cloth according to the product instructions.
Frequency: Depending on the intensity of use, a typical application is every three to six months.
When should you give up DIY and seek professional help?
- The item is excessively valuable: monetary value/sentimental value
- The leather is made of a unique and delicate material: aniline leather/suede/exotic leather
- The damage is complex and extensive
- The cost of repair is beyond your budget
- You lack the patience and resources to perform the repair
The damaged area is too large or the location is critical
Extensive damage: Self-repairing can result in visual unevenness, poor texture, and widespread peeling. We recommend hiring a professional leather restorer for a complete renovation or partial leather replacement. Damage to critical areas: Self-repairing can lead to insufficient structural strength, rapid deterioration of the repaired area, and noticeable cosmetic flaws. Professional structural repair or replacement of specialized parts is recommended.
Involves structural damage (such as cavern collapse)
This is internal structural damage. The leather may be intact. This may be beyond the scope of leather repair and enter a more complex soft packing project. It is recommended to seek help from a professional soft packing master with experience.
For valuable or commemorative items
Our repair philosophy for this type of leather product is not to act as a restorer, but as a guardian. Our sole purpose is to not damage the leather. We recommend seeking professional appraisal agencies (official after-sales service of the leather product purchase site) to inquire about the material, degree of damage, and construction process. After determining the minimum damage, we recommend whether to DIY or hand it over to a professional repair agency.
Lack of confidence or the right tools
This is a problem most people encounter, and I believe it’s solvable. Build confidence through risk-free practice and build your toolbox through phased investment.
1. Overcoming Lack of Confidence
Finding used/old leather items: This is the best, zero-cost/low-cost method. You can find an old leather bag or shoe as your test piece and perform DIY repairs on it without any worry. If it breaks, you can even experiment with another old leather item.
Start with the most basic and safest practices: Practice the professional cleaning and care procedures we discussed earlier on your practice piece. Get the feel of a horsehair brush, observe how the cleaner foams, and experience the changes in the leather before and after the oil is absorbed. This process is not only safe but also allows you to develop a close connection with the material. 2. Solve the problem of not having tools: You don’t need to buy all the leather repair tools at once, buy them in stages; Stage 1: Core cleaning and maintenance toolbox, maintenance toolbox list (a set of high-quality leather cleaner and care oil, two horsehair brushes, several fiber cloths) and repair toolbox list (a small package leather kit, a pack of high-grit sandpaper, a bottle of medical alcohol, a household hair dryer). You can start with Stage 1
Professional Leather Restoration Services Revealed
After discussing the intricacies of DIY restoration, let’s take a look behind the scenes at a professional leather restoration studio to understand the difference between DIY and professional restoration.
Part 1: The Standardized Workflow (S.O.P.) of Professional Restoration
From the moment an item is handed over to a professional restorer to its perfect state, it typically undergoes the following rigorous process:
Step 1: Reception, In-Depth Consultation, and Risk Disclosure
• What to Do: Professionals won’t simply accept the item and say, “No problem.” They’ll ask you questions, like a doctor, about the item’s brand, age, and condition. How did the damage occur? Have you tried any treatment products yourself? Do you want a “like-new” restoration or “preserve its charm”?
• The Secret: This step is designed to manage expectations and mitigate risks. Through communication, they can determine your true needs and inform you in advance of potential risks (e.g., color variations due to special materials, or structural fragility that prevents complete restoration). A restorer who dares to say “no” or discloses risks upfront is generally considered a more professional person. Step 2: Professional Diagnosis and Plan
• What to Do: Restorers use specialized tools (such as a magnifying glass and colorimeter) and extensive experience to accurately diagnose the leather:
• Accurately identify the leather type: Is it coated leather? Aniline leather? Or a special type of oil-waxed leather?
• Assess the depth of damage: Is it only the coating or has it also damaged the leather? Is the structure sound?
• Develop a detailed repair plan: They will develop a detailed, step-by-step repair plan and provide a clear quote.
• Secrets: This is a testament to experience. They may be able to determine the tanning method of the leather by touch and smell, and the cause of the damage by observing the crack pattern.
Step 3: Meticulous “Pre-operative” Preparation
• What to Do: This is one of the most time-consuming and professional steps.
• Thorough Cleaning and Degreasing: Use industrial-grade, stronger cleaners and degreasers to ensure the repaired surface is absolutely pristine. • Perfect Masking: Use high-precision masking tape and masking fluid to perfectly protect every hardware, seam, and lining edge.
• Secret: DIYers often overlook or underestimate the importance of this step. Professionals, on the other hand, spend considerable time preparing, knowing that perfect preparation is half the battle for the final result.
Step 4: “Targeted” Restoration Execution
• Color Matching:
• DIY: Repeated visual comparisons under natural light.
• Professional: Use a **computerized colorimeter (spectrophotometer** to read the leather’s precise color data and generate a base formula. This is then fine-tuned by experienced colorists, achieving a match exceeding 99%.
Coloring Process:
• DIY: Primarily manual sponge application.
• Professional: An airbrush is standard. In a professional spray booth (equipped with exhaust and lighting), multiple thin coats of airbrush are applied to create an absolutely uniform, seamless, “factory-grade” finish. Color Fixing and Finishing:
• DIY: Use a one-component, water-based finish.
• Professional: Often use a two-component (2K) finish or a finish with a crosslinker. These products require mixing with a curing agent, which forms a chemical crosslink upon drying. Their abrasion, scratch, and chemical resistance far surpass those of one-component products, approaching the level of automotive clearcoat. They can also precisely adjust the finish’s gloss level (from 0% full matte to 90% high gloss) based on the factory settings.
Step 5: Quality Inspection, Finishing, and Curing
• What’s Done: After the repair is completed, the repair will be carefully inspected under different lighting (cold, warm, and natural) to ensure uniform color and gloss. The hardware will be cleaned and polished, and basic maintenance will be performed on unrepaired areas to ensure a uniform finish.
• Secret: They have a dedicated drying or curing room where temperature and humidity are controlled to ensure the chemical curing of the repair coating under optimal conditions, ensuring maximum strength. Part Two: The Professionals’ True “Secret Weapon”
If there’s a “secret,” it’s not a magic potion, but rather a comprehensive system of advantages:
• Experience
They have hundreds of case studies stored in their heads, enabling them to quickly identify problems and anticipate risks. This intuition and judgment can’t be acquired through reading or watching videos.
• Industrial-grade Products
The products they use are typically not sold to the public and feature higher concentrations, more stable performance, and more specialized formulations. They understand the chemical compatibility of their entire product line and know which cleaners, colors, and finishes work perfectly together.
• Precision Specialized Equipment
From computerized colorimeter and specialized spray systems to heated tools and texture pads for retexturing, these devices achieve precision and results unattainable by hand.
• Commitment to Quality
Professionals thrive on their reputation and their work. Their attention to detail, rigorous process, and unwavering commitment to the end result are the core hallmarks of their expertise.
A Buying Guide to Restorative Materials and Products
Before purchasing, remember the most important principle: whenever possible, purchase products from the same brand and product line. Professional leather restoration products (especially those related to color and color fixation) are chemically formulated to ensure perfect compatibility. Mixing products from different brands can lead to unpredictable problems such as poor adhesion, chemical reactions, and uneven color. Therefore, choosing a reputable brand and building your toolbox around its product line is the fastest path to success.
Comparison of online and offline purchasing channels
| Features / Comparison Dimensions | Online Purchasing Channels | Offline Channels |
|---|---|---|
| Core Advantages | Unrivalled selection and price competitiveness | Precise color matching and face-to-face expert advice |
| Product selection range | Extremely wide: from mass consumer grade to professional industrial grade, global brands are available, and the product system is complete | Very limited: There are usually only a few mainstream maintenance brands, and it is difficult to find a professional repair product system. |
| Price level | Lower: Easy to compare prices, often discounted, and direct access to manufacturers | Higher: Includes store operating costs, and prices are usually uncompetitive |
| Color matching accuracy | Low/Difficult: Depends on screen display, has serious risk of color difference, and is not suitable for accurate color correction | High/precision: You can bring the actual product to the store and compare it with the physical color card for perfect matching |
| Get professional advice | Limited: Only text or email customer service available, no physical diagnosis | Valuable: You can communicate directly with experienced store staff or masters to get targeted and reliable advice |
| Convenience and immediacy | Convenient, but not instant: orders can be placed 24 hours a day, but you need to wait for logistics transportation. | Instant, but not convenient: buy and use immediately, but require a special trip, and stores may be scarce |
| User evaluation reference | Very rich: You can consult a large number of real users' pictures, texts, and video reviews to assist in decision-making | Almost none: You can only rely on personal judgment and store clerk recommendations |
| Suitable level for purchase | Все уровни:<br> - Начальный уровень: Широкий выбор комплектов «все в одном».<br> - Продвинутый/Профессиональный уровень: Единственный канал для приобретения полной профессиональной системы цветокоррекции и реставрации | Начальный уровень:<br> - Подходит для покупки первого набора базовых инструментов для чистки и обслуживания.<br> - Подходит для покупки конкретных продуктов по совету эксперта. |
| Main risks/disadvantages | Risk of color difference when purchasing pre-mixed colors; unable to verify the actual texture of the product | Too few product options to meet slightly complex repair needs |
Как определить высококачественные средства для ремонта кожи
1. Профессионализм и целенаправленность
Красные флаги: Продукты, заявляющие о «чистке, кондиционировании и окрашивании три в одном», «подходящие для всех видов кожи» или «освежающие одним движением». Такой упрощенный маркетинг часто означает, что формула жертвует специализированным опытом ради широкого спектра действия, что приводит к кратковременным результатам и потенциальным проблемам.
Зеленые флаги: Бренды предлагают комплексную и сегментированную линейку продуктов. Например:
Очистка: Они предлагают как «мягкое чистящее средство» (для ежедневного использования), так и «сильнодействующее чистящее средство» (для глубокой очистки).
Уход: Они предлагают крем для ухода за «обработанной кожей» и специализированный питательный лосьон для «анилиновой кожи».
Ремонт: Они предлагают отдельные чистящие средства, обезжириватели, наполнители, различные базовые красители и фиксаторы цвета с различным уровнем глянца (матовый, полуглянцевый и глянцевый).
2. Прозрачность состава и научная формула
Красные флаги: Списки ингредиентов расплывчаты или наполнены маркетинговыми уловками, такими как «нанофактор» и «революционная формула», без какой-либо фактической информации о химическом составе. Признаки качества:
На водной основе: Как для красителей, так и для фиксаторов, водная основа является золотым стандартом для современной профессиональной реставрации. Она безопаснее, имеет меньше запаха и предлагает большую гибкость, чем традиционные продукты на основе растворителей.
Нейтральный pH: Высококачественные чистящие средства будут четко помечены как «pH-нейтральные» или «pH-сбалансированные», что гарантирует их очистку без нарушения исходного pH-баланса кожи и защитного покрытия.
Без вредных растворителей и низкокачественных силиконов: Хорошие средства по уходу используют такие ингредиенты, как ланолин и натуральные воски, а не полагаются исключительно на дешевые силиконы для создания временного, ложного блеска. Низкокачественные силиконы могут забивать поры и препятствовать последующей реставрации.
Предоставление технических паспортов/паспортов безопасности (TDS/SDS): Самые профессиональные бренды предоставляют подробные технические паспорта или паспорта безопасности для своих продуктов, демонстрируя свою высочайшую приверженность профессионализму и безопасности.
3. Системная совместимость
Предупреждающий знак: Бренд продает лишь несколько «хитовых» товаров в разрозненном, неорганизованном виде.
Признак качества: Бренд предлагает «систему реставрации». Их предварительные обработки, наполнители, красители и фиксаторы разработаны для бесперебойной совместной работы. Это обеспечивает оптимальную химическую и физическую адгезию между каждым слоем, от базового до верхнего покрытия.
4. Репутация бренда и целевые клиенты
Предупреждающие знаки: Основным маркетинговым каналом бренда являются преувеличенные сравнительные видеоролики в социальных сетях, а его целевая аудитория — это в основном обычные потребители, ищущие «чудесные исправления за одну минуту».
Признаки качества:
Профессиональный выбор: Если основной клиентской базой бренда являются профессиональные реставраторы автомобильных салонов, реставраторы мебели или центры по уходу за предметами роскоши, то качество и надежность его продукции уже признаны отраслью.
История и репутация: Бренды с многолетней историей и многократными упоминаниями и рекомендациями опытных энтузиастов и профессионалов на специализированных форумах (таких как детейлинг автомобилей и реставрация мебели) обычно очень надежны.
Цена отражает ценность: Высококачественные продукты часто имеют более высокую цену из-за более высоких затрат на НИОКР, более качественного сырья и более стабильной производительности. Остерегайтесь необычно дешевых «чудодейственных средств для ремонта».
5. Образовательные ресурсы и поддержка клиентов
Предупреждающие знаки: Упаковка содержит лишь несколько простых инструкций, а веб-сайт предлагает скудную информацию. Отличительный признак качества: Официальный веб-сайт бренда или каналы в социальных сетях предлагают обширные, подробные обучающие ресурсы:
Длинные видеоуроки, подробно описывающие каждый шаг и меры предосторожности.
Иллюстрированные статьи, объясняющие причины и принципы ремонта различных проблем.
Доступна профессиональная и оперативная поддержка клиентов для ответов на конкретные технические вопросы.
Рекомендуемые известные бренды и линейки продуктов
Важное примечание: Следующий список не является коммерческой рекламой или абсолютным рейтингом. Вместо этого, это справочник, составленный на основе публичных отзывов пользователей, обсуждений на профессиональных форумах и специализации брендов в конкретных областях.
1. Colourlock (Lederzentrum): Происходит из Германии, пользуется высокой репутацией в области реставрации высококлассных автомобильных салонов.
2. Furniture Clinic: Происходит из Великобритании, предлагает комплексную линейку продуктов и отличное обучение пользователей, включая многочисленные обучающие иллюстрации и видео, что делает его идеальным как для начинающих, так и для опытных профессионалов DIY-реставрации.
3. Leather World Technologies: Происходит из США, является известным брендом в индустрии домашней и автомобильной реставрации. Его продукты профессиональны и надежны, предлагая полный спектр решений от базовых до продвинутых.