


Tools and Preparation
Sewing leather fabric starts with gathering the right tools, like a stitching awl for hand sewing or leather needles for machine sewing. You’ll need strong polyester or nylon thread and clips instead of pins to avoid permanent holes. For machine sewing, a Teflon or walking foot helps the leather glide smoothly. Always test your settings on scrap leather to ensure the stitch length (3-3.5 mm) and tension work well.
Hand Sewing vs. Machine Sewing
For hand sewing, the saddle stitch is a popular method, involving punching holes with an awl and using two needles for a secure finish. Machine sewing is faster but requires adjusting your machine, like lowering thread tension to 1 and using a denim needle for faux leather. Both methods work, but hand sewing suits small, detailed projects, while machine sewing is better for larger items.
Working with Faux Leather
Faux leather is easier to sew and maintain, often cleaned with a damp cloth. Use a non-stick presser foot and avoid pinning in visible areas to prevent damage. It’s a great alternative for beginners, offering similar looks to real leather without the ethical concerns.
A Detailed Guide to Sewing Leather Fabric
This comprehensive guide explores the art of sewing leather fabric, covering tools, techniques, and tips for both real and faux leather. It aims to provide a thorough resource for beginners and experienced sewers alike, ensuring you can tackle leather projects with confidence. The following sections detail the process, drawing from expert advice and practical insights.
Introduction to Sewing Leather Fabric
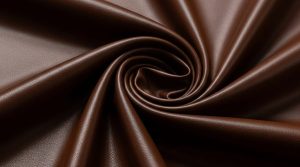
Sewing with leather fabric is a rewarding skill that allows for the creation of durable, stylish items like bags, jackets, and accessories. Unlike traditional fabrics, leather requires specific techniques due to its thickness and rigidity. This guide will cover both hand sewing and machine sewing methods, as well as tips for working with faux leather, a popular alternative. Whether you’re crafting a small clutch or a larger garment, understanding these methods will enhance your sewing repertoire.
Tools and Materials: Essential Equipment
Before starting, gather the necessary tools and materials to ensure a smooth sewing process. Leather’s unique properties necessitate specialized equipment, as outlined below:
- Stitching Awl: Used for punching holes in leather for hand sewing, ensuring clean, precise holes.
- Leather Needles: Essential for both hand and machine sewing. These needles have a triangular point to pierce leather without tearing. For machine sewing, sizes like 90/14 for thin leather and 100/16 for thicker hides are recommended.
- Thread: Choose strong, durable threads such as polyester or nylon (e.g., TEX 40 for machine sewing). Avoid cotton threads, as they may not handle leather’s thickness.
- Scissors or Rotary Cutter: Sharp cutting tools are crucial for clean edges. A rotary cutter is ideal for straight cuts, especially with faux leather.
- Clips or Pattern Weights: Pins can leave permanent holes, so use clips (e.g., Clover brand Wonder clips) or weights to hold patterns in place.
- Rubber Cement or Glue: Useful for temporarily bonding leather pieces during preparation, offering light alignment without a permanent bond.
- Stitching Groover (optional): Creates a shallow trench along the seam line, protecting the thread and providing a guide for stitching.
- Overstitch Wheel (optional): Helps mark even stitch spacing for hand sewing, with a size six wheel creating six stitches per inch for standard projects.
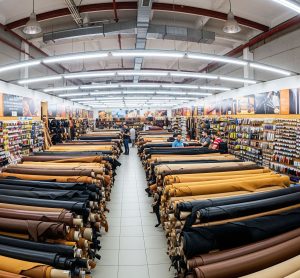
When selecting leather, consider the type and thickness. Thin, soft leathers like lambskin (3-6 sq. ft. per skin) are ideal for beginners, while thicker hides suit structured items. For faux leather, choose options with fabric-like backing for easier sewing, avoiding rubbery textures that can be challenging.
Hand Sewing Leather: A Step-by-Step Process
Hand sewing leather is a traditional technique offering precision and control, perfect for small projects or when a machine isn’t available. The saddle stitch is the most common method, known for its strength and durability.
Step-by-Step Guide to Hand Sewing Leather:
Prepare the Leather: Apply a light coat of rubber cement to both pieces and press them together when nearly dry. This helps align the pieces precisely without a permanent bond.
- Create a Stitching Groove: Use a stitching groover to create a shallow trench along the seam line, protecting the thread and providing a guide.
- Mark Stitch Spacing: Use an overstitch wheel (e.g., size six for six stitches per inch) to mark the spacing in the groove, ensuring even stitches.
- Punch Holes: With a stitching awl, pierce holes at each marked dot, holding the awl at a 90-degree angle for uniform spacing and depth.
- Thread the Needles: Cut a piece of thread three times the length of the area to be sewn. Thread both ends through separate needles and lock them by piercing one thread loop with the other needle, repeating for both ends.
- Sew the Saddle Stitch: Start by sewing through the first hole with both needles from opposite sides, pulling the thread snug. Continue this back-and-forth technique until you reach the end.
- Lock the Stitch: At the end, sew back a few stitches, pull the thread snug, and cut it flush against the project.
Tips for Hand Sewing:
- If needles get stuck, use needle-nose pliers to help pull them through.
- For thicker leather, widen holes with the awl if needed.
- Practice on scrap pieces to perfect your technique, as mistakes can be permanent due to leather’s properties.
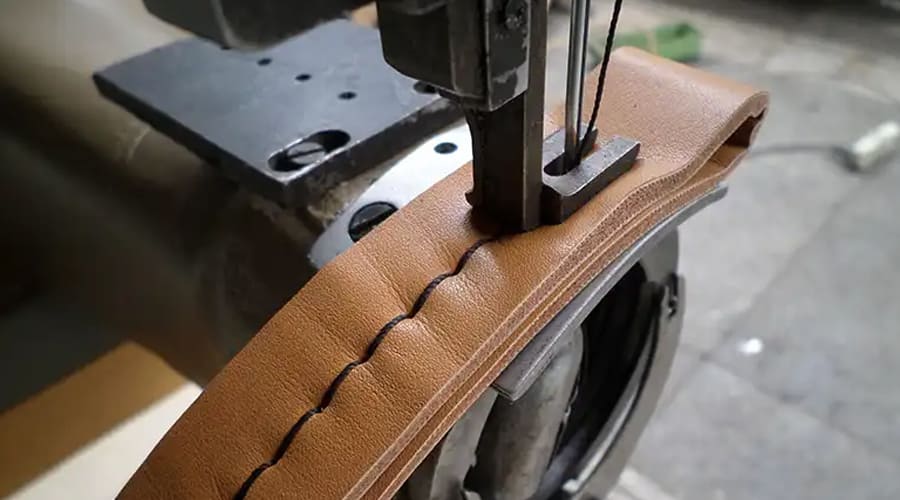
Machine Sewing Leather: Efficient and Effective
Machine sewing leather is faster and suitable for larger projects, but it requires adjustments to your sewing machine. Not all machines can handle thick leather, so test your equipment first.
Preparation for Machine Sewing:
- Needle Selection: Use a leather needle, with sizes like 90/14 for thin leather and 100/16 for thicker hides. For faux leather, a denim needle (e.g., size 14) is recommended for a sharper point.
- Presser Foot: Use a Teflon foot, zipper foot, or walking foot to help the leather glide smoothly. Alternatively, place wax paper or frosted Scotch tape under a regular presser foot to reduce sticking.
- Machine Settings: Set the stitch length to 3-3.5 mm (about 1/8 inch) and decrease thread tension to 1 (from a typical 3-4). Adjust presser foot pressure to 3 if possible for better control.
Step-by-Step Guide to Machine Sewing Leather:
- Baste the Pieces: Use Wonder clips or double-stick basting tape to hold the leather pieces together, avoiding pins to prevent permanent holes.
- Cutting: Lay the leather right side up on a cutting mat. Use sharp shears for curved cuts and a rotary cutter for straight lines, securing patterns with weights or tape.
- Sewing: Start sewing slowly, ensuring the leather feeds evenly. A walking foot helps keep layers aligned, preventing bunching.
Finishing: Be cautious with seam ripping, as it can weaken the leather. If re-sewing, use the same needle holes to avoid creating new marks.
Tips for Machine Sewing:
- Always test settings on scrap pieces first to ensure stitch length and tension work well.
- For projects with multiple layers, ensure your machine can handle the thickness. A regular home machine typically manages up to 4 layers of thin leather.
- If leather sticks to the presser foot, try a Teflon foot or place parchment paper under it.
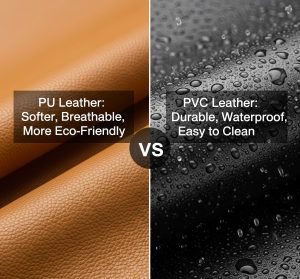
Working with Faux Leather: A Practical Alternative
Faux leather, also known as pleather, is a popular alternative to real leather, offering similar aesthetics at a lower cost and without ethical concerns. It’s easier to maintain, often cleaned with a damp cloth, and comes in various textures and patterns.
Tips for Sewing Faux Leather:
- Avoid Pinning in Visible Areas: Pins leave permanent holes, so only pin in the seam allowance if necessary, using clips or tape instead.
- Use Non-Stick Presser Feet: A Teflon foot or tractor-style foot (e.g., Janome’s Ultra Glide foot at Janome Ultra Glide, Janome’s Roller foot at Janome Roller, or Walking foot at Janome Even Feed) prevents sticking. Alternatively, tape the bottom of a regular foot with frosted Scotch tape.
- Needle Choice: Use a denim sewing needle for a sharper point, avoiding leather needles which can tear faux leather.
- Holding Pieces Together: Use clips, tape, or fabric glue in the seam allowance, being careful with seam ripping as re-sewing must use the same needle holes.
- Pressing: Use a synthetic setting on your iron with a pressing cloth, pressing from the wrong side when possible to avoid damage.
- Enhance the Look: Add more seams and topstitch on both sides for an authentic leather appearance, as shown in project examples like the Faux Leather Shopper at Sew4Home Shopper or Trendy Faux Leather Handbag at Sew4Home Handbag.
Faux leather’s versatility makes it ideal for beginners, with options like medium-thickness fabrics with fabric-like backing sewing wonderfully without additional interfacing.
Additional Tips and Tricks: Enhancing Your Skills
To further improve your leather sewing, consider these practical tips:
- Handling Sticky Fabrics: If leather or faux leather sticks to the presser foot, use a Teflon foot or place parchment paper under it to reduce friction.
- Dealing with Thick Layers: For projects with multiple layers, consider hand sewing for precision or using an industrial machine if available. A regular machine may struggle with more than 4 layers, so plan accordingly.
- Finishing Seams: For a professional look, consider skiving the edges (thinning the leather) before sewing to reduce bulk, especially for visible seams.
- Practice: Always practice your techniques on scrap pieces before starting your project. This is crucial with leather, as mistakes are harder to fix due to permanent needle marks and weakened areas.
Conclusion: Embracing Leather Sewing
Sewing leather fabric, whether real or faux, is a skill that opens up a world of creative possibilities. From crafting stylish accessories to upholstering furniture, the durability and aesthetic appeal of leather make it a favorite among crafters and designers. By understanding the right tools, techniques, and tips, you can create beautiful and functional items that stand the test of time. Remember to practice patience and precision, as working with leather requires a different approach than sewing with traditional fabrics.